
AWS Production Deployment
Publish the application on the internet (~1–3 hours)
After local setup works, deploy to AWS so your team can access the app on the internet. You need: a domain name (optional for testing), PostgreSQL (Supabase recommended), and an AWS account.
11. Pre-Deployment Checklist
11.1 Deployment checklist
- Local setup completed (Part 1) - you can sign in at localhost.
- Production PostgreSQL database ready (Supabase or AWS RDS).
- Domain name pointed to your host (for HTTPS).
- LICENSE.txt purchase code validated on the production server.
- .env values prepared for production (see table below).
11.2 Production environment variables
Set these in AWS Amplify Console or in .env on EC2 (never commit .env to Git):
| Variable | Production example |
|---|---|
| BETTER_AUTH_URL | https://app.yourdomain.com |
| NEXT_PUBLIC_APP_URL | https://app.yourdomain.com |
| NEXT_PUBLIC_BASE_URL | https://app.yourdomain.com |
| DATABASE_URL | Supabase pooler URL (port 6543) |
| DIRECT_DATABASE_URL | Supabase direct URL (port 5432) |
| BETTER_AUTH_SECRET | Long random secret (32+ characters) |
| AWS S3 / email keys | As configured in App Settings |
11.3 Choose a hosting option
| Option | Best for | Difficulty |
|---|---|---|
| AWS Amplify | Fastest deploy, managed CI/CD, auto SSL | Easier |
| AWS EC2 | Full server control, custom nginx/PM2 | Moderate |
12. Deploy with AWS Amplify
AWS Amplify hosts Next.js apps with automatic builds from GitHub, GitLab, or Bitbucket.
12.1 Prerequisites
- AWS account - https://aws.amazon.com
- Code in a Git repository (GitHub recommended).
- Node.js 20 supported (Amplify selects runtime automatically).
12.2 Connect repository
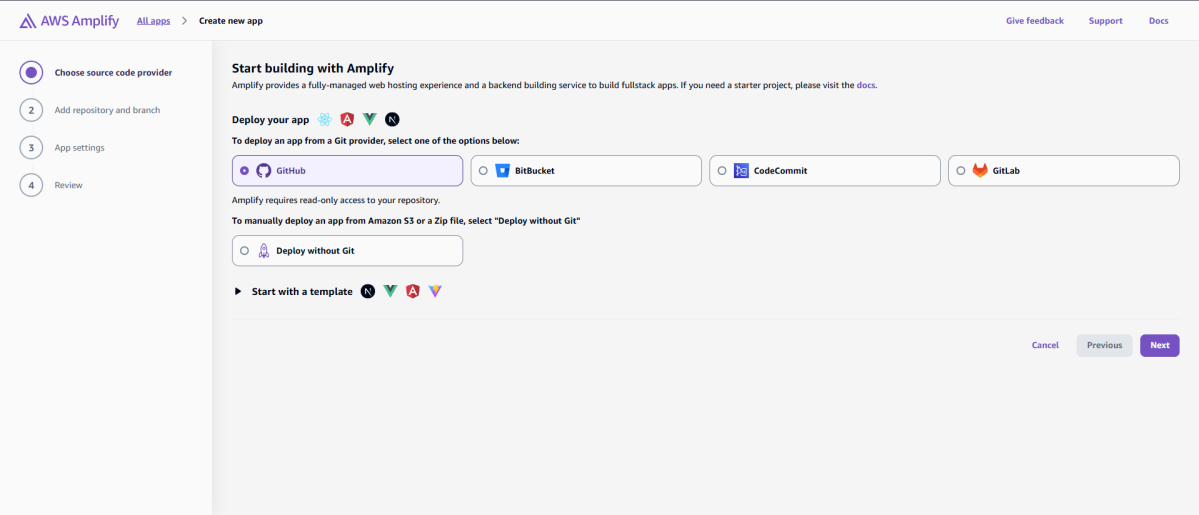
- Open AWS Console → search Amplify → Hosting → Get started.
- Choose Host web app → GitHub (or your provider) → Authorize AWS.
- Select your repository and branch (e.g. main).
- App name: e.g. project-management-Solution.
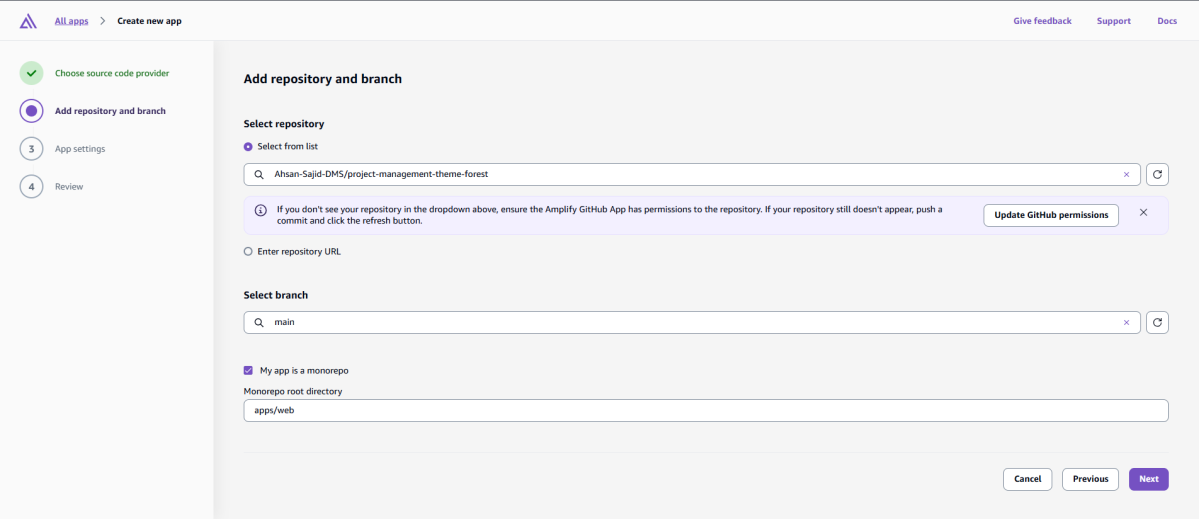
12.3 Configure build settings (monorepo)
Use these settings for this project (pnpm monorepo):
| Setting | Value |
|---|---|
| App root | / (repository root) |
| Build command | pnpm install && pnpm build |
| Start command / output | Amplify detects Next.js - use default SSR |
| Node.js version | 20.x |
| Package manager | pnpm |
Optional: add amplify.yml in repository root:
version: 1
applications:
  - frontend:
      phases:
        preBuild:
          commands:
            - npm install -g pnpm
            - pnpm install
        build:
          commands:
            - pnpm build
      artifacts:
        baseDirectory: apps/web/.next
        files:
          - '**/*'
      cache:
        paths:
          - node_modules/**/*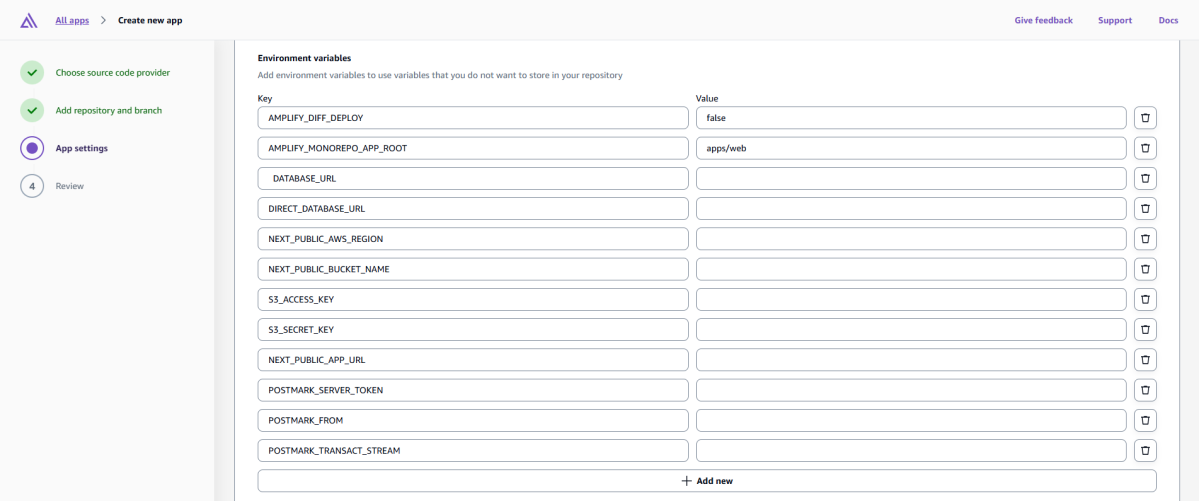
- .pnpm-store/**/*12.4 Environment variables in Amplify
- Amplify app → Environment variables → Manage variables.
- Add every key from your production .env (Section 11.2).
- Save and redeploy.
12.5 Custom domain and SSL
- Amplify app → Hosting → Custom domains → Add domain.
- Follow DNS instructions (CNAME records at your registrar).
- Amplify provisions free SSL (HTTPS) automatically.
- Update BETTER_AUTH_URL and NEXT_PUBLIC_* to https://yourdomain.com.
12.6 Run the installation wizard in production
- Open https://yourdomain.com/install (first visit only).
- Complete wizard: license, database, admin account.
- Sign in at https://yourdomain.com/sign-in.
Verification: Site loads over HTTPS, admin login works, browser tab shows your favicon and site title.
12.7 Amplify troubleshooting
| Problem | Solution |
|---|---|
| Build fails | Check Node 20, pnpm install logs; set SKIP_ENV_VALIDATION=1 only if needed for build |
| 502 / app error | Verify env vars; check Amplify runtime logs |
| Database error | Allow Amplify outbound IP in Supabase; correct DATABASE_URL |
| Auth redirect loop | BETTER_AUTH_URL must match exact HTTPS domain |
13. Deploy on AWS EC2
EC2 gives you a Linux server. You install Node.js, build the app, and run it with PM2 behind nginx.
13.1 Create EC2 instance
- AWS Console → EC2 → Launch instance.
- Name: project-management-server.
- AMI: Ubuntu Server 22.04 LTS (64-bit).
- Instance type: t3.small minimum (t3.medium recommended).
- Create or select a key pair (.pem) for SSH.
- Security group: allow SSH (22), HTTP (80), HTTPS (443).
- Storage: 30 GB+.
- Launch instance.

13.2 Connect to server
From your computer (replace with your key and IP):
ssh -i "your-key.pem" ubuntu@YOUR_EC2_PUBLIC_IPWindows: Use PowerShell or PuTTY. On first connect, type yes to trust the host.
13.3 Install Node.js and pnpm on EC2
- Update packages: sudo apt update && sudo apt upgrade -y
- Install Node 20: curl -fsSL https://deb.nodesource.com/setup_20.x | sudo -E bash - && sudo apt install -y nodejs
- Verify: node -v (must show v20+)
- Install pnpm: sudo npm install -g pnpm
- Verify: pnpm -v
- Install PM2: sudo npm install -g pm2
- Install nginx: sudo apt install -y nginx
13.4 Upload project to EC2
Choose one method:
- Git clone: sudo apt install -y git → git clone YOUR_REPO_URL → cd project folder
- SFTP: Upload ZIP with FileZilla/WinSCP to /home/ubuntu/ and unzip
- Place project in e.g. /home/ubuntu/project-management-theme-forest
- Create .env in project root with production values (Section 11.2).
13.5 Build and database on EC2
- cd /home/ubuntu/project-management-theme-forest
- pnpm install
- pnpm exec dotenv -e .env -- pnpm db:push (sync database schema)
- pnpm build
Expected: Build completes without errors. If env validation fails, fix .env before build.
13.6 Run app with PM2
cd /home/ubuntu/project-management-theme-forest
pm2 start "pnpm start" --name lottae-app
pm2 save
pm2 startup
App runs on port 3000 internally. Verify: curl http://localhost:3000
13.7 Configure NGINX reverse proxy
Create nginx site config: sudo nano /etc/nginx/sites-available/lottae
server {
  listen 80;
  server_name app.yourdomain.com;
  location / {
    proxy_pass http://127.0.0.1:3000;
    proxy_http_version 1.1;
    proxy_set_header Upgrade $http_upgrade;
    proxy_set_header Connection 'upgrade';
    proxy_set_header Host $host;
    proxy_set_header X-Real-IP $remote_addr;
    proxy_cache_bypass $http_upgrade;
  }
}- Enable site: sudo ln -s /etc/nginx/sites-available/lottae /etc/nginx/sites-enabled/
- Test: sudo nginx -t
- Reload: sudo systemctl reload nginx
13.8 Enable HTTPS with Let's Encrypt
- Point domain A record to EC2 public IP.
- sudo apt install -y certbot python3-certbot-nginx
- sudo certbot --nginx -d app.yourdomain.com
- Follow prompts; certbot configures HTTPS automatically.
13.9 Run the installation wizard in production
- Open https://app.yourdomain.com/install
- Complete license, database, and admin steps.
- Sign in and test file uploads and email if configured.
13.10 EC2 troubleshooting
| Problem | Solution |
|---|---|
| Cannot SSH | Check security group port 22; correct .pem permissions (chmod 400) |
| Site not loading | pm2 status; nginx -t; sudo ufw allow 80,443 if firewall enabled |
| 502 Bad Gateway | Ensure pnpm start is running on port 3000 |
| Out of memory on build | Use larger instance or add swap space |
14. Post-Deployment Checklist
- HTTPS works (padlock in browser).
- https://yourdomain.com/sign-in - admin login works.
- Install wizard completed; .install.lock exists on server.
- Site title and favicon show in browser tab.
- Database backups scheduled (Supabase or RDS).
- PM2 or Amplify monitoring enabled.
15. Update Production
- Amplify: push to Git - Amplify rebuilds automatically.
- EC2: git pull (or upload new files) → pnpm install → pnpm build → pm2 restart lottae-app
- Always backup database before major updates.
16. Quick Reference (Production)
| Task | Amplify | EC2 |
|---|---|---|
| Deploy | Git push → auto build | git pull + pnpm build + pm2 restart |
| Env vars | Amplify Console | .env file on server |
| Logs | Amplify build/runtime logs | pm2 logs lottae-app |
| SSL | Amplify custom domain | certbot --nginx |
End of Setup Guide